What Exactly Are Push Piers and How Do They Support a Settling Foundation?
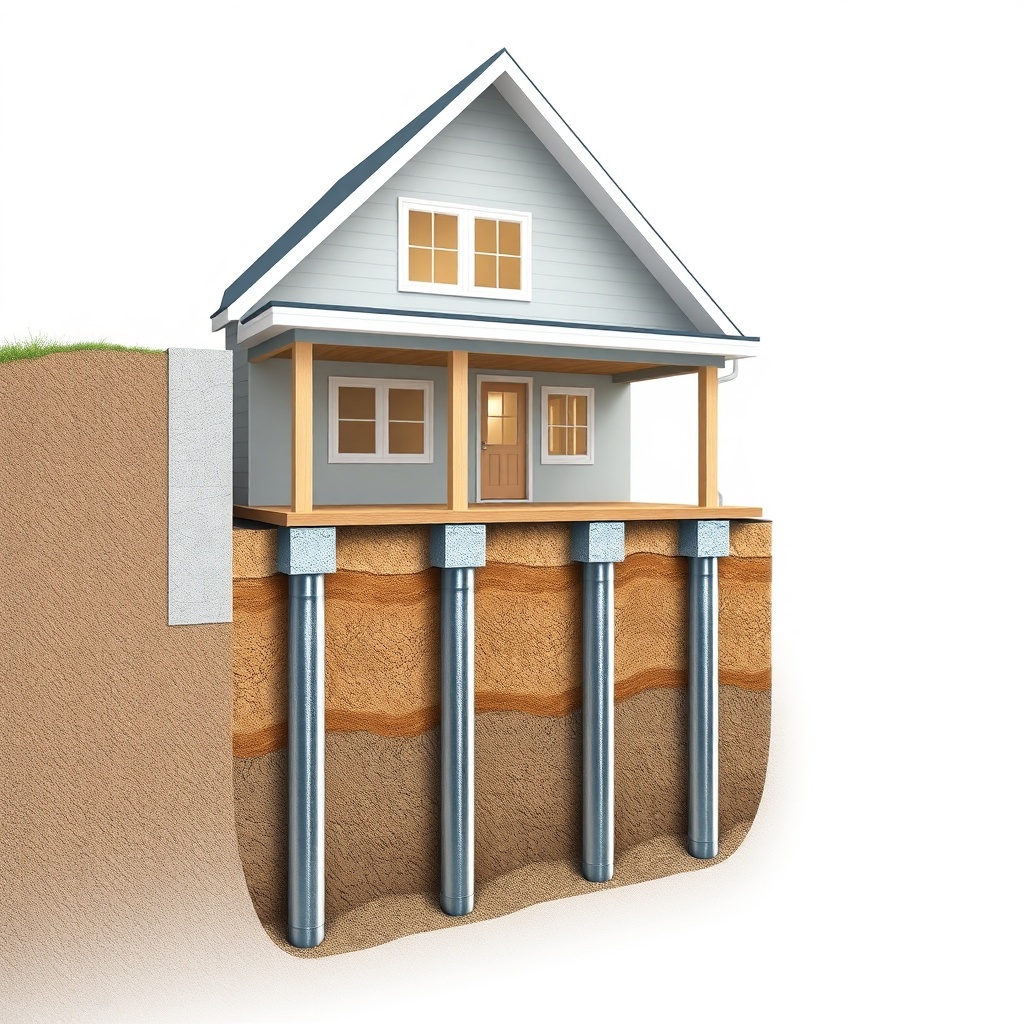
Push piers—often called resistance piers or underpinning piers—are steel pipe segments driven deep into stable load-bearing soil to lift and permanently stabilize a foundation that has settled or sunk. When concrete slabs or perimeter footings lose support due to soil compaction, moisture changes, or poor compaction, push piers transfer the weight of your home to competent strata, often 20 to 40 feet below grade. This article explains how push piers correct sloping floors, let you understand the mechanics, and help you evaluate whether this piering-underpinning solution fits your home.
How Do Push Piers Correct Sloping Floors in a Settled Foundation?
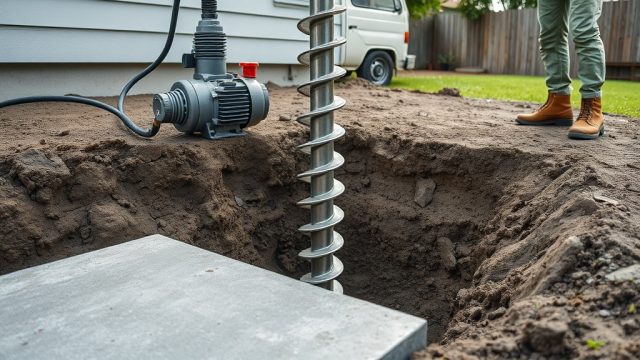
Sloping floors are a classic sign that the soil under your home has lost its ability to bear the structure’s weight. Push piers work by creating a column of high-capacity steel that bypasses weak, compressible soil. The installation process begins with exposing the foundation footing. A hydraulic ram pushes each pier segment downward, one section at a time, until it reaches refusal—typically when the pier hits bedrock or dense soil with a bearing capacity of at least 10,000 pounds per square foot (psf). Once the pier is driven, a bracket is secured to the foundation, and the hydraulic jack lifts the slab or beam until the floor returns to near its original elevation. The result: sloping floors are level again, and your foundation now rests on deep, stable soil that will not settle further.
What Are the Key Components of a Push Pier System?
A standard push pier system consists of several critical parts, each engineered to transfer loads efficiently and resist corrosion.
- Pier Pipe Sections: Typically 3.5 to 4.5 inches in diameter, heavy-wall galvanized steel pipe. Each section is 2 to 5 feet long with male/female threaded or pinned couplings.
- Drive Head or Drive Cap: A reinforced steel cap fitted over the top pier section to distribute the hydraulic ram force evenly.
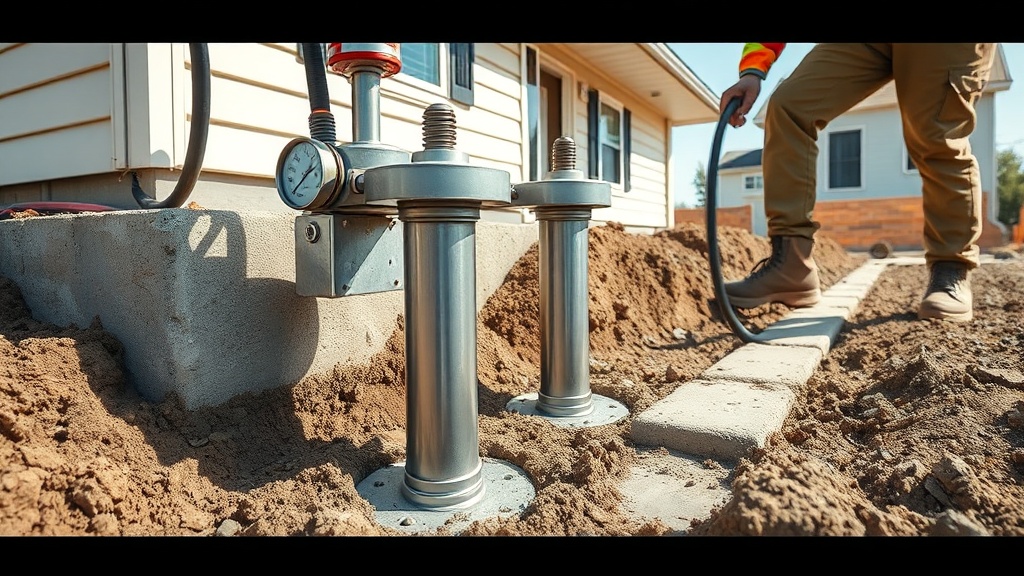
- Hydraulic Ram (Jack): A high-capacity cylinder, often rated between 50 and 100 tons, that pushes the pier down stroke by stroke.
- Load Transfer Bracket: A heavy steel bracket (sometimes called a bearing plate or footer bracket) bolted to the foundation footing. It transfers the building weight onto the pier stack.
- Grout or Void Fill (optional): In some systems, a low‑pressure grout is injected under the lifted slab to fill any voids left after lifting.
While the basic design is simple, the engineering behind each component is precise. The pier’s wall thickness, galvanization coating, and coupling strength all affect the system’s long-term performance. For homes with significant sloping—say, a 3‑inch difference across a 20‑foot span—a push pier system with 4‑inch diameter pipe and a 60‑ton ram is common.
How Does the Push Pier Installation Process Work Step by Step?
The installation of push piers follows a methodical sequence that typically takes two to four days for a single‑story home with moderate settlement. Here is the typical step‑by‑step process:
- Site assessment and excavation: Technicians dig small pits (often 2 ft × 4 ft) at each pier location along the foundation. They expose the footing and clean the concrete surface.
- Bracket mounting: The load transfer bracket is bolted or epoxied onto the footing. The bracket must be plumb and centered.
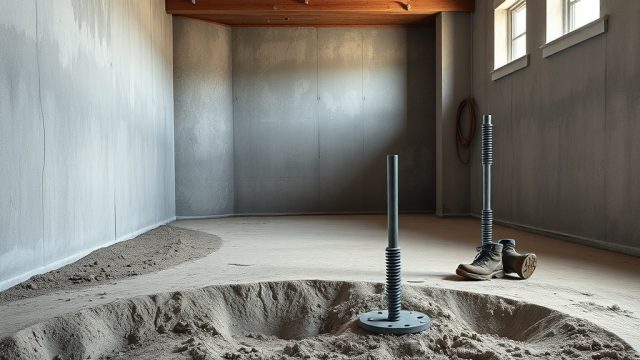
- Pier section placement: The first pier section is inserted into the bracket and aligned vertically. The hydraulic ram is positioned on top of the drive head.
- Driving the pier: The ram pushes the section downward in short strokes (typically 8 to 12 inches per stroke). As each section nears full insertion, a new section is added via threaded or pinned connection.
- Torque monitoring: Installation crews record the driving force at each depth. A load graph ensures the pier reaches refusal (e.g., 80,000 pounds of resistance).
- Lifting the foundation: Once all piers are driven to refusal, the same hydraulic ram lifts the foundation. Technicians raise the structure slowly (1/8 inch at a time) to avoid cracking.
- Shim and lock: After the desired lift, steel shims or a locking collar are placed between the bracket and the pier to hold the new position.
- Backfill and restoration: Excavation pits are backfilled with compacted soil, and the area is graded to drain water away from the foundation.
A complete push pier repair for a typical 1,800‑sq‑ft home costs between €8,000 and €20,000 depending on soil conditions, number of piers (usually 6 to 12), and local labor rates. The table below compares typical specifications for two common push pier systems.
| Specification | Standard Push Pier | Heavy‑Duty Push Pier |
|---|---|---|
| Pipe diameter | 3.5 in (89 mm) | 4.5 in (114 mm) |
| Wall thickness | 0.375 in (9.5 mm) | 0.5 in (12.7 mm) |
| Average ultimate capacity | 50,000 lbf (222 kN) | 80,000 lbf (356 kN) |
| Hydraulic ram rating | 50 tons | 100 tons |
| Recommended for | Slab‑on‑grade, light settlement | Basement footings, heavy structures or severe settlement |
| Typical lift capacity per pier | 30,000–40,000 lbf | 50,000–70,000 lbf |
| Galvanized coating (ASTM A123) | 3.9 mils (100 μm) | 5.9 mils (150 μm) |
| Typical cost per pier (installed) | €1,200–€1,800 | €1,800–€2,600 |
How Do Push Piers Compare with Helical Piers for Sloping Floors?
Push piers and helical piers are both deep foundation solutions, but they operate differently. Helical piers have screw‑like plates that are twisted into the ground and rely on torque for capacity. Push piers use end‑bearing resistance against a hard layer. For sloping floors caused by uniform settlement of a clay soil over a deep zone, push piers are often preferred because they can reach refusal in cohesive soils with less disturbance. Helical piers excel in sandy or loose soils where torque can be consistently measured. A detailed comparison is available in our guide Push Piers vs Helical Piers: Cost and Application Comparison for Homeowners. However, push piers generally offer higher ultimate capacity per pier and are less dependent on soil friction—making them ideal for larger homes or heavier commercial builds.
Another important consideration: if your foundation also shows signs of rotation—where one corner has sunk more than the opposite corner—push piers can be combined with targeted lifting to correct the twist. Read our step‑by‑step guide: Push Piers for Foundation Rotation: A Step-by-Step Repair Guide.
What Are the Most Common Installation Mistakes to Avoid with Push Piers?
Even the best designed push pier system can fail if improperly installed. Common errors include:
- Inadequate bearing refusal: If the pier is stopped too early (e.g., before reaching 50,000 lbf resistance), it may settle again over time. Always demand a certified load graph.
- Poor bracket alignment: If the bracket is not plumb, the pier will push at an angle, reducing capacity. This is especially risky on sloping slabs.
- Lifting too fast: Raising the foundation more than ¼ inch at a time can crack walls and slabs. Slow, incremental lifting is critical.
- Neglecting drainage: Push piers fix the symptom (settlement) but not the cause (water). If hydrostatic pressure from poor drainage pushes water under your slab, you may need ongoing moisture management. See Push Piers and Water Drainage: How to Prevent Hydrostatic Pressure.
- Skipping annual inspection: A push pier system needs a yearly check for corrosion, shifting brackets, or settling around the piers. Our Push Piers Maintenance Checklist: Annual Inspection Tips lists what to monitor.
Avoiding these mistakes and hiring an installer who follows the Push Piers Installation Mistakes to Avoid: Common Errors and How to Prevent Them checklist can save you thousands in future repairs.
What Do Homeowners Say About Push Pier Repairs for Sloping Floors?
Homeowners who have used push piers often express two main sentiments: relief that the floors are finally level and surprise at how quickly the repair is done. “We had a 3‑inch slope in our living room that made us dizzy,” says a homeowner near Dublin. “The crew installed six push piers in three days, and our floor is now within ⅛ inch of level. It’s been two years and no movement.” Another owner emphasizes the importance of warranty: “Make sure the company offers a transferable lifetime warranty. We got one, and it helped sell our house.”
Conversely, some owners note that the process is messy—excavation pits leave mud and dust—and that interior cracks from the original settlement may still be visible. “Push piers fixed the problem, but we had to repair drywall cracks afterward,” says a homeowner in Cork. “Still, it was worth it.” Many owners also recommend pairing the piering work with improved surface drainage to prevent future issues. “We added downspout extensions and regraded the lawn after the push piers. Best investment we made.”
Frequently Asked Questions About Push Piers for Sloping Floors
1. How long does a push pier repair last?
With proper installation and annual maintenance, push piers can last 100+ years. The steel is galvanized to resist corrosion in typical soil conditions.
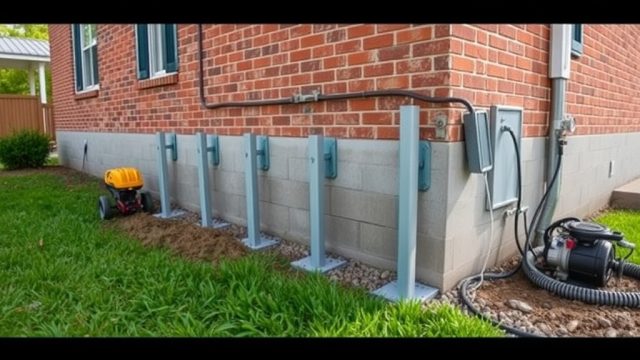
2. Can push piers be used on a home with a basement?
Yes, push piers are commonly installed on basement walls or footings. The brackets are bolted to the concrete wall or footing, and the piers are driven outside the house from excavated pits.
3. Do I need to move out during push pier installation?
No, the work is done from the exterior. You may experience some vibration as the piers are driven, but the living areas remain usable.
4. How much does it cost to fix sloping floors with push piers in Europe?
Typical costs range from €8,000 to €20,000 for a standard home. Per‑pier costs are €1,200–€2,600. The total depends on the number of piers and soil depth.
5. Will push piers stop my floor from sloping further if the soil is clay?
Yes, because the piers transfer weight to deep stable soil below the clay. However, if the clay itself shrinks and swells seasonally, an interior moisture management system may be needed to prevent slab movement.
6. Can I install push piers by myself?
No. Installation requires heavy hydraulic equipment, engineering expertise, and precise load monitoring. Always hire a licensed foundation repair contractor with liability insurance.