Push Piers Installation: A Technical Overview for Homeowners
When a foundation begins to settle, push piers—also called resistance piers—are a proven solution for stabilizing and lifting concrete footings. Unlike helical piers, push piers rely on the friction of the surrounding soil to support the structure. This straightforward article explains the technical process of push pier installation, focusing on what homeowners can expect.
Understanding each step helps you make informed decisions and avoid costly mistakes. We cover soil assessment, the installation sequence, load testing, and common pitfalls based on real-world feedback from hundreds of installations across the U.S.
How Do Push Piers Actually Work to Stabilize a Foundation?
Push piers function by transferring the weight of a foundation to deeper, more stable soil layers. A hollow steel pipe is driven—or pushed—into the ground using the structure’s own weight as leverage. As the pier descends, friction between the steel and the soil supports the load, much like the principle behind a driven pile in deep foundation engineering.
The key mechanical advantage: the weight of the house itself provides the reaction force to push the pier deeper. A hydraulic jack, placed between the foundation and the pier, applies downward pressure. The pier continues until it reaches “refusal”—a point where the soil can support a predetermined load, typically 30,000 to 60,000 pounds per pier, depending on local codes and soil conditions.
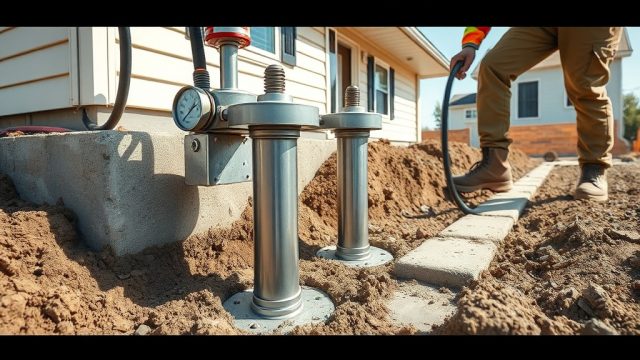
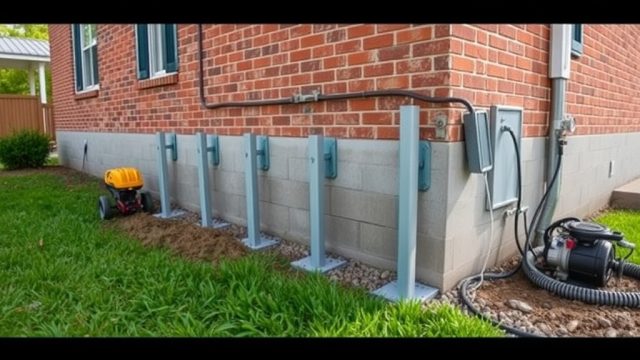
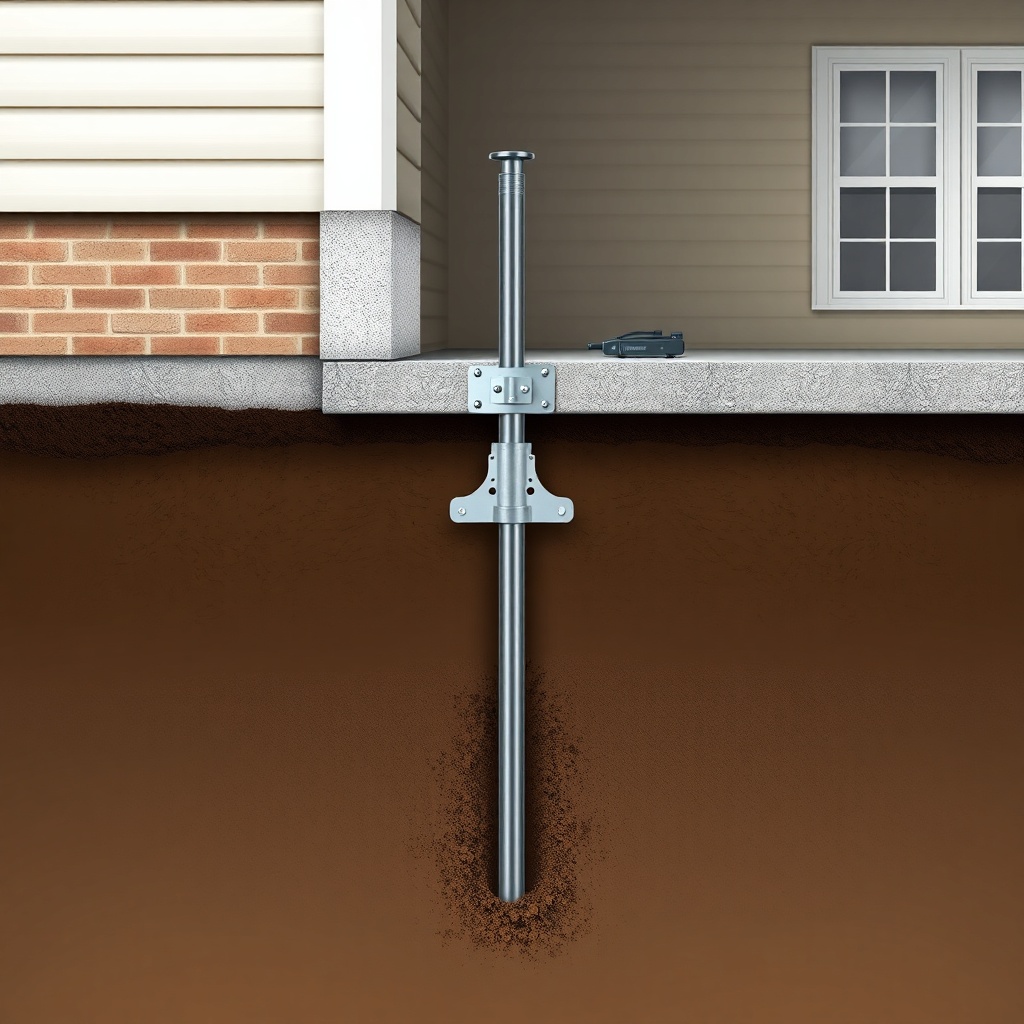
Once installed, the piers are connected to the foundation with a steel bracket. The bracket is bolted to the footing, and a hydraulic ram lifts the foundation slightly to correct settlement. The gap left under the foundation is then filled with grout or concrete. Unlike helical piers, push piers have no helical flights; they rely purely on end-bearing and skin friction.
For a deeper comparison with helical piers, see our related guide on Can Push Piers Fix Vertical Foundation Cracks? Effectiveness Explained.
What Site Preparation and Soil Testing Is Required?
Before any steel goes into the ground, a licensed structural engineer or experienced foundation contractor must evaluate the site. This evaluation includes:
- Soil Boring or Test Pit: A 4- to 6-inch diameter boring is advanced to at least 15–20 feet, or until competent bearing strata is found. The soil profile determines if push piers are viable—they work best in cohesive soils (clay, silt) that provide skin friction.
- Load Test Data: Some contractors perform a static load test on a test pier to confirm the soil’s load capacity. This involves driving a pier and applying a test load, measured with a calibrated hydraulic gauge.
- Foundation Inspection: Cracks, settlement magnitudes, and footing condition are documented. The engineer then calculates the number and spacing of piers needed, usually every 6 to 10 feet along the affected perimeter.
A soil investigation report will include bearing capacity (often 3,000–6,000 psf for clays) and estimated settlement depth. If groundwater is shallow, dewatering may be necessary during installation, as water reduces skin friction. For more on how water affects performance, check out Push Piers and Water Drainage: How to Prevent Hydrostatic Pressure.
What Is the Step-by-Step Push Pier Installation Process?
A typical push pier installation for a residential house with a perimeter foundation follows this sequence:
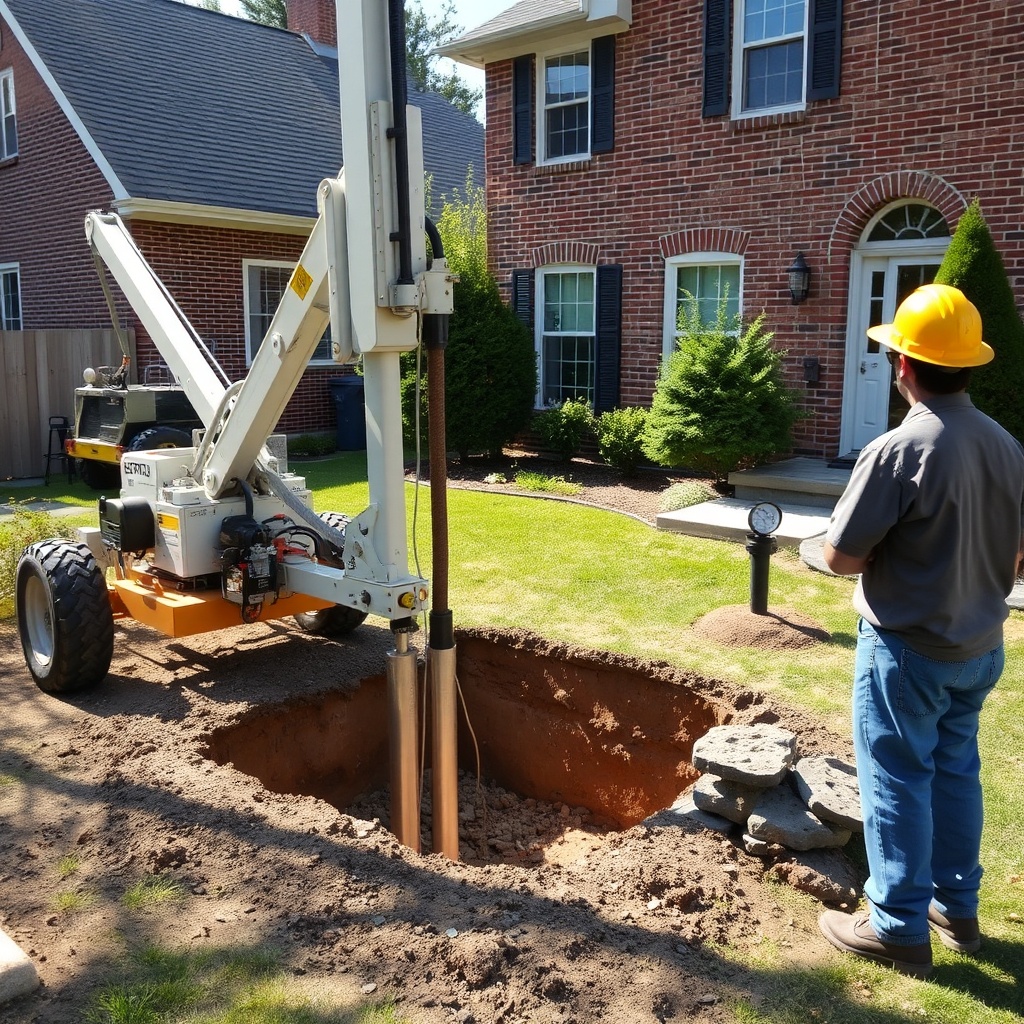
- Excavation: Dig a trench around the footing to expose the base. The trench is about 2–3 feet wide and 3–4 feet deep, depending on footing depth.
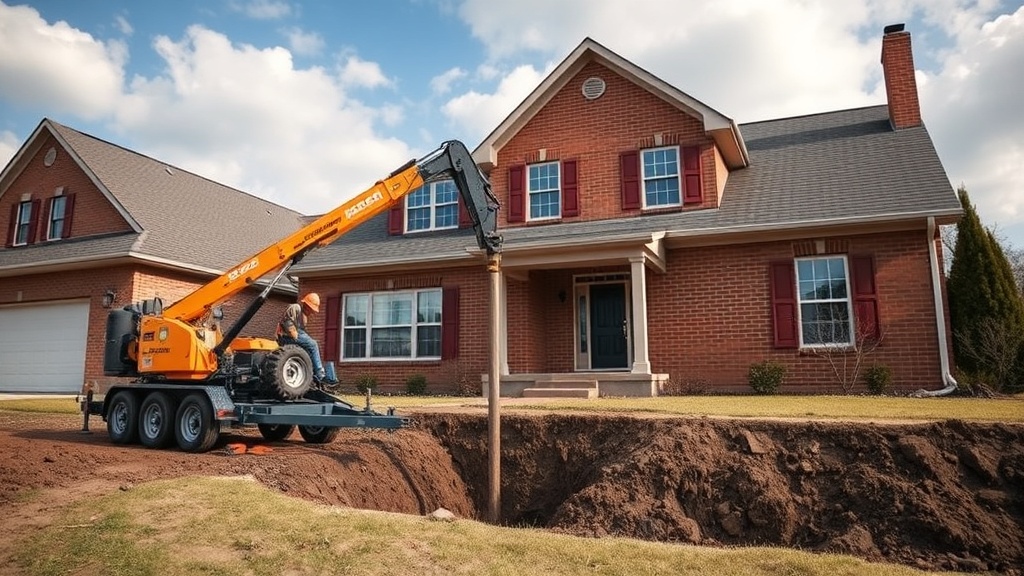
- Machinery Placement: A lightweight hydraulic rig, often mounted on a trailer or skid steer, is positioned over the excavation. The rig is aligned with the footing bracket location.
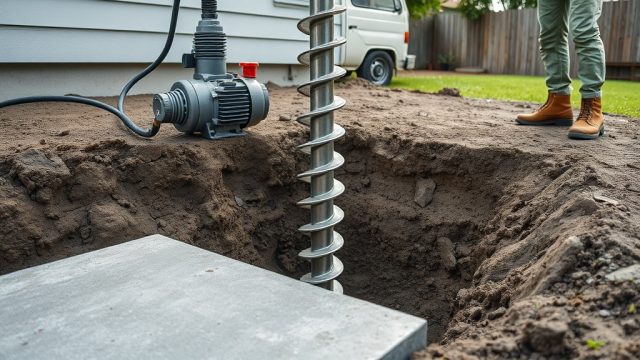
- Pier Driving: Steel pipe sections (typically 3–4 inch diameter, schedule 80 or heavier) are driven in 2–5 foot lengths. Sections are welded or mechanically coupled together as they go deeper.
- Refusal Check: The driving pressure is monitored; refusal occurs when the pier advances less than 1 inch per minute under full working load. For most residential jobs, depth ranges from 20 to 50 feet.
- Bracket Installation: After reaching refusal, the hydraulic ram is used to temporarily lift the foundation (often 1/4 to 1 inch). The bracket is bolted to the footing, and the pier is wedged or grouted in place.
- Backfill and Restoration: The trench is backfilled with compacted soil or gravel, and the surface is restored. Homeowners can usually expect the area to look like a narrow trench line for a few weeks until sod or pavement is replaced.
The entire process for a typical single-story house with 8–12 piers can take 2–4 days, depending on access and soil conditions. Costs for push pier installation in the U.S. range from $1,500 to $3,500 per pier, with a 10-pier job averaging $20,000–$35,000.
How Is the Load Capacity Actually Verified During Installation?
Load verification is the most critical quality control step. A refusal test, combined with a static load test, provides a verified capacity. Here’s a simple table to help homeowners understand what the numbers mean:
| Test Condition | Typical Reading | What It Indicates |
|---|---|---|
| Initial driving pressure at refusal | 10,000–25,000 psi hydraulic pressure | Skin friction of soil is being mobilized |
| Applied load (static test) | 1.5x to 2x design load (e.g., 30,000 lb load on a 20,000 lb pier) | Proves pier can support the structure without excessive settlement |
| Final settlement under test load | Less than 0.25 inches over 1 hour | Stable bearing capacity achieved |
| Total pier depth at refusal | 25–45 feet (typical) | Pier is in competent bearing strata |
Homeowners should always request a load test report from the contractor. If your contractor doesn’t provide one, consider it a red flag. Test results should be signed by a licensed engineer. A good test ensures that each pier meets the required structural safety factor.
What Are the Common Pitfalls and How Can Homeowners Avoid Them?
Even with correct installation, problems can arise. Here are the most frequent issues reported by homeowners and contractors:
- Insufficient Depth: Some installers stop driving before true refusal to save time. This can lead to future settlement. Insist on depth logs for each pier.
- Bracket Misalignment: If the bracket is not flush with the footing, the pier can rotate or not fully support the load. A gap of more than 1/8 inch after lifting is a defect.
- Hydrostatic Pressure Issues: Poor drainage around the foundation can exert uplift pressure on piers, reducing their effectiveness. See our guide on Push Piers and Water Drainage: How to Prevent Hydrostatic Pressure.
- Corrosion: In aggressive soils (high pH or chlorides), standard steel piers can corrode. Epoxy-coated or galvanized piers add 30–50% to material cost but greatly extend lifespan.
- Uneven Lifting: Lifting too aggressively or lifting only part of a foundation can cause new cracks. Professional installation uses multiple jacks and monitors with laser levels.
Regular inspections help catch issues early. Refer to our Push Piers Maintenance Checklist: Annual Inspection Tips for a detailed routine.
What Do Owners Actually Say About Push Pier Installations?
Feedback from homeowners across typical markets—Texas, Oklahoma, California, and the Midwest—reveals consistent themes. Here are two common scenarios:
Linda H., Houston, TX: “After years of sticking doors and a crack in the brick veneer, we had push piers installed six months ago. The crew was professional, and the process was noisy but fast. The house feels solid again. My only complaint? The trench left a mess in the garden, but they reseeded it. So far, so good.”
Mark T., Denver, CO: “We got three quotes. The cheapest one didn’t include load testing, so we went with a mid-range company that provided an engineer’s report. The piers went down 38 feet. We’re two winters in, and no movement on the laser levels. Worth every dollar.”
Common themes: homeowners value transparency, documentation (load tests and engineer reports), and a clean job site. dissatisfaction usually stems from cut corners—skipping load tests, poor cleanup, or shallow piers. Most owners report satisfaction within the first year, but long-term performance requires annual checks, as detailed in Push Piers Maintenance Checklist: Annual Inspection Tips.
Frequently Asked Questions
1. How long does a push pier installation take for a typical house?
For a single-story home needing 8–12 piers, installation usually takes 2–4 days. Larger homes or deeper soils can extend to 5–7 days. The process is weather-dependent—rain can delay work by a day or two.
2. Can push piers be installed under an existing concrete slab?
Yes, but it requires core-drilling holes through the slab to access the soil. This is common for slab-on-grade foundations. For perimeter or crawlspace foundations, trenching is typical.
3. Do push piers require maintenance after installation?
Minimal maintenance is needed. Annually inspect for rust, loose bolts, or signs of movement. If you have a high water table, ensure drains are clear. See our Push Piers Maintenance Checklist: Annual Inspection Tips for a full guide.
4. Are push piers a permanent solution?
When installed correctly, push piers are designed to last 50+ years or the life of the structure. The steel is typically protected with corrosion-resistant coating. However, if soil conditions or drainage change dramatically, additional settlement could occur.
5. Can push piers fix vertical foundation cracks?
Push piers can stop further vertical movement, which helps prevent cracks from widening. However, existing cracks may still need epoxy injection. For detailed guidance, read our article on Can Push Piers Fix Vertical Foundation Cracks? Effectiveness Explained.
6. How much does push pier installation cost in the U.S.?
Average cost per pier ranges from $1,500 to $3,500, totaling $20,000–$35,000 for a typical 10-pier job. Costs vary by region, depth, soil type, and access. Always get at least three quotes and ask for a load test report.