Protecting Helical Piers from Water Damage: Best Practices
Helical piers are a robust foundation repair solution, but even the strongest steel is vulnerable to moisture over time. Water damage can accelerate corrosion, undermine soil bearing capacity, and compromise the long-term stability of your foundation. This guide outlines proven strategies to safeguard your helical pier system from water-related issues, helping you maximize its service life—which typically exceeds 50 years with proper care.
Why Does Water Pose a Risk to Helical Piers?
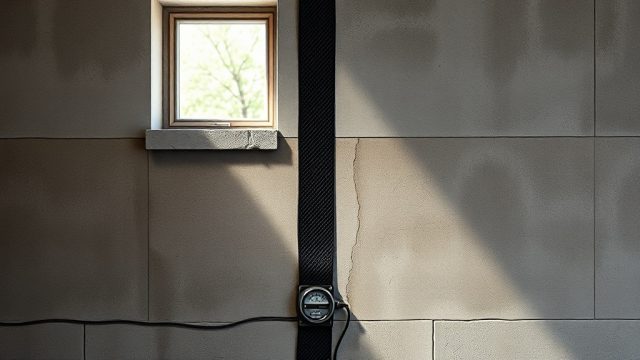
Helical piers are typically made of galvanized steel to resist rust, but no coating is impervious to constant moisture exposure. When water pools around the pier shaft or the bracket connection at the foundation, it can lead to galvanic corrosion, especially if the soil has high chloride or sulfate levels. Additionally, saturated soil reduces the friction that holds helical piers in place, potentially causing settlement over time. The most common failure point is the top bracket assembly, which is exposed to surface runoff and splashing from rain or melting snow.
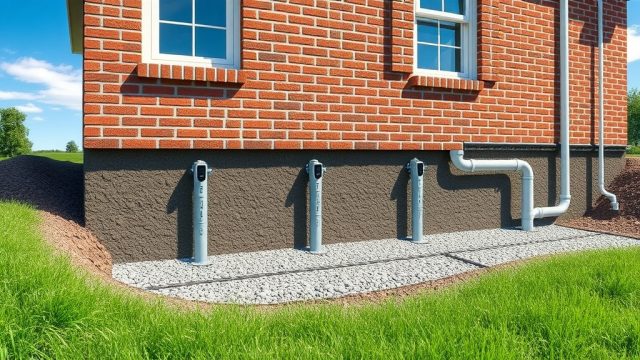
Poor drainage is often the underlying cause. If downspouts discharge near the foundation, or the soil grade slopes toward the house, water accumulates directly over the pier heads. Over years of freeze-thaw cycles, this moisture can also cause frost heave, lifting the piers slightly and creating gaps under the foundation. Regular inspection and proactive drainage management are your first line of defense.

How Can Proper Drainage Reduce Water Exposure?
Effective drainage is the most impactful step you can take. Start by ensuring that gutters and downspouts carry roof water at least 10 feet away from the foundation. Use splash blocks or underground downspout extensions to direct flow away from the pier locations. The soil grade around the house should slope at a minimum of 5% (6 inches of drop over 10 feet) outward from the foundation.
For properties with helical piers installed below decorative patios or walkways, consider installing a perimeter drain system. A French drain with a perforated pipe wrapped in filter fabric, placed 12–18 inches below grade, will intercept groundwater before it reaches the pier brackets. This is particularly important in clay soils, which drain slowly and stay wet longer than sandy soils. A simple gravel trench can also work if the water table is deep and local drainage is decent—saving you £300 to £800 in contractor costs compared to a full French drain.
- Check that downspout extensions are not blocked or frozen.
- Verify that sprinkler heads are not spraying directly onto pier brackets.
- Inspect crawlspace vents to ensure they aren’t clogged with debris, which can trap moisture.
For existing homes, a professional drainage assessment costs between £150 and £400, and is often worth the investment to pinpoint hidden water pathways.
What Are the Best Waterproofing Coatings for Helical Piers?
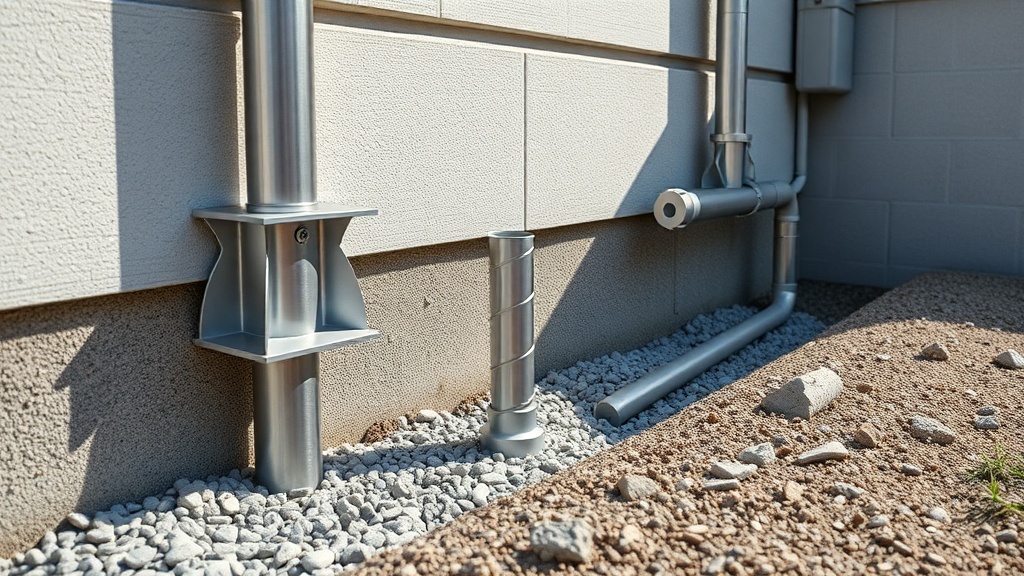
Most helical piers come with a standard G90 galvanized coating (approximately 0.90 ounces of zinc per square foot) from the factory. This provides decent protection against atmospheric corrosion, but in persistently wet or chemically aggressive soils, an additional barrier is recommended. Two excellent options are bituminous asphalt coatings (like those used on foundation walls) and two-part epoxy-based systems. For piers installed in high-water-table zones, consider using a sacrificial anode system or wrapping the shaft with a polyethylene barrier.
Application is straightforward: after the pier is installed and the bracket is bolted to the foundation, clean the exposed metal with a wire brush to remove any dirt or rust bloom. Apply the coating generously from the bracket down to at least 12 inches below the soil line. Reapply every 5–7 years as part of routine maintenance. A gallon of quality bituminous coating costs roughly £35 to £60, enough to treat 8–10 pier heads. Epoxy systems run £50–£90 per kit but offer superior adhesion and durability in wet environments.
Never use standard exterior paint—it will peel and trap moisture against the steel, promoting rust. Similarly, avoid petroleum-based greases, which can degrade and attract dirt that holds water against the metal.
Does Landscaping Affect Helical Pier Longevity?
Yes—improper landscaping is one of the most common contributors to moisture-related pier damage. Beds of mulch or heavy soil piled against the foundation can hold water directly at the pier bracket for days after rain. Raised flower beds that concentrate runoff over the piers are equally damaging. The best practice is to maintain at least 6 inches of visible clearance between the foundation sill and any landscaping material, and to keep the area around each pier bracket free of debris.
If you have decorative stones or gravel around the piers, ensure they are installed on a sloped base that directs water away, not toward the foundation. Avoid planting shrubs or trees within 10 feet of helical piers; roots can disrupt drainage patterns and even cause minor soil movement near the bracket connection. A simple strip of rubber mulch or clean 3/4-inch crushed stone around pier heads improves drainage and makes visual inspections easier. The cost to maintain this zone is negligible—about £20–£40 for a 50-pound bag of decorative stone per pier.
Another detail often overlooked: the splash effect from sprinklers. Adjust irrigation timers so that water does not run toward the foundation, and test spray patterns seasonally to confirm no sprinkler head is soaking the piers. Even a small leak from a hose bib can create a damp microclimate around a bracket.
How Should You Inspect for Corrosion or Moisture Damage?
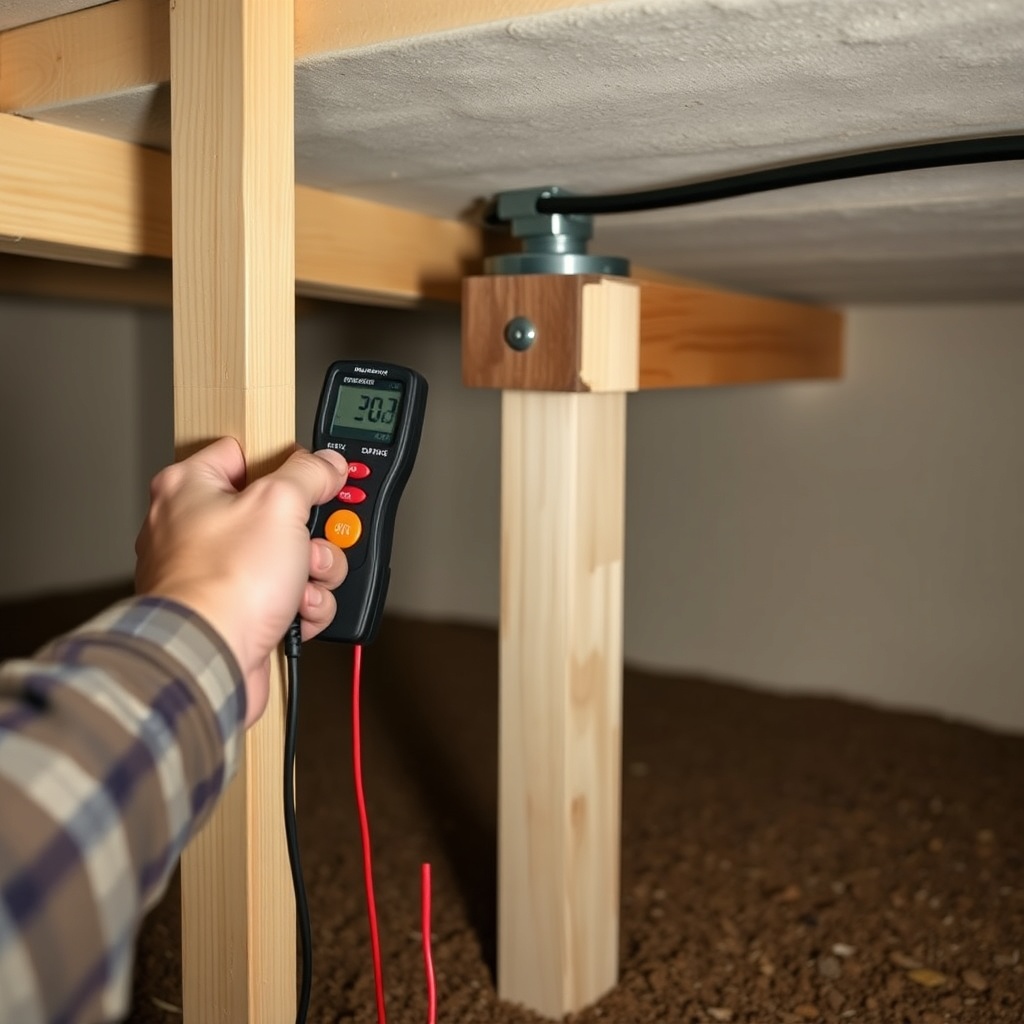
Visual inspections should be performed at least twice a year, ideally in spring and fall. Look for orange or reddish-brown staining on the steel (the first sign of active rust). Check the bracket bolts and welds for any pitting or flaking metal. Use a moisture meter ($25–$50 at hardware stores) to test the wood sill plate adjacent to the pier bracket; readings above 20% indicate excessive moisture that can accelerate corrosion.
If you spot rust bloom, it’s often manageable early on. Use a wire brush to remove loose scales, then apply a rust converter primer (about £15 per quart) followed by the waterproof coating mentioned earlier. If rust has created pits deeper than 1/16 inch, or if you see any coating blisters or delamination, Helical Piers for Cracked Foundation Walls: A Complete Guide provides step-by-step repair instructions. More advanced corrosion may require replacing the bracket assembly, which typically costs £400–£800 per pier including labor.
Pay special attention to the area where the bracket attaches to the foundation wall. This is a common moisture trap because the concrete surface can wick capillary water upward. Seal this joint with a flexible polyurethane caulk—avoid silicone, which doesn’t bond well to metal. Reapply caulk every two years or after any significant foundation movement.
| Symptom | Urgency Level | Recommended Action |
|---|---|---|
| Light orange surface staining with no flaking | Usually not urgent | Clean with wire brush, apply rust converter primer, and monitor annually. Delay coating renewal if budget is tight. |
| Flaking rust or visible pits up to 1/16 inch deep | Needs attention soon | Remove loose rust, treat with phosphoric acid-based converter, and apply waterproof epoxy coating within 90 days. |
| Puddles of standing water touching the bracket | Needs attention soon | Grade soil away immediately, install drainage pipe or gravel trench, and consider a sump pump if water persists. |
| Corrosion penetrating more than 1/8 inch into steel | Urgent | Schedule bracket replacement within 30 days; temporary load reduction may be needed. Consult a structural engineer. |
| Moisture meter reading above 20% on adjacent wood sill | Needs attention soon | Investigate source of moisture (roof leak, plumbing leak, high water table) and address it before rot spreads. |
What Role Does Soil Compaction Play in Water Damage Prevention?
Helical piers transfer load through both end-bearing on their helical plates and friction along the shaft. When water saturates the soil around the pier, especially in loose backfill, the friction component can drop by up to 40%. This is why proper compaction of the soil around the pier shaft during installation is critical—it limits water infiltration pathways. If a helical pier was installed in a loosely compacted borehole, water can channel straight down the shaft, washing out fine particles and creating voids.
You can improve an existing installation by retrofitting a soil stabilizer ring—a plastic or metal collar that sits at grade level around the pier shaft and diverts surface water away. These cost about £20 each and take 20 minutes to install. For deeper water issues, consider injecting a bentonite clay slurry around the shaft. Bentonite expands when wet and forms a waterproof seal. A contractor can do this for £200–£500 per pier, depending on depth and access. This is especially effective in silty or sandy soils that drain water quickly but also erode easily.
Keep in mind that helical piers installed in rock or very dense soil are less prone to water-driven settlement. However, no soil type is immune to the corrosive effects of standing water on the steel components. The best strategy combines soil management with regular coating maintenance and drainage improvements.
What Owners Say
Homeowners who have taken proactive steps against water damage consistently report better outcomes. One owner in the Pacific Northwest—a region with mild but consistent rainfall—noted that a simple French drain around the house eliminated the musty crawlspace smell and rust staining that had appeared on the pier brackets after four years. She adds, “I spent about £500 on the drain, but it saved me from replacing two brackets that were already peeling. Totally worth the early expense.”
Another owner in a clay-soil area of the Midwest discovered that a downspout extension was only 4 feet long—well short of the 10 feet needed. After extending it, the puddle that had been sitting against the foundation wall dried up within a week. He credits that fix with stopping the corrosion he was seeing on the pier brackets. “I nearly paid £300 for a drainage contractor,” he says, “until a friend told me to check the gutters first. Cost me £12 for the extension tube. Simple but effective.”
A third homeowner, who installed helical piers three years ago under a sunroom addition, explained how he used a moisture meter as part of his seasonal checklist. “Last autumn my meter showed 22 percent on the sill, which was a red flag. Turned out a sprinkler head was directed right at the wall. I moved the head 5 feet and the number dropped to 14 percent the next check.” His advice: “Don’t wait for visible rust—test for moisture. It’s cheap insurance.”
Frequently Asked Questions
Can I use a standard rust-inhibiting spray on my helical piers?
Standard spray paints contain solvents that may not bond well to galvanized steel. Use a primer specifically designed for galvanized surfaces (like those used in metal roofing) followed by a polyurethane topcoat. For deeper protection, use a bituminous coating or epoxy. Avoid spray paints that are not rated for exterior metal use—they can peel in less than one year.
How often should I check my helical piers for water damage?
Inspect twice a year—once after the spring thaw and once before winter freeze. Also perform a quick check after any heavy rainfall event that exceeds 2 inches in 24 hours. This is especially important if the piers are located in low-lying areas or near downspouts.
Does adding a sump pump under the house protect the piers?
A sump pump helps reduce overall moisture in the crawlspace or basement, which indirectly protects brackets from condensation and humid air. However, it does not prevent surface water from pooling around the pier shafts near the exterior. You still need good exterior grading and drainage. For comprehensive protection, combine a sump pump with a French drain system.
Are helical piers more vulnerable to water damage than push piers?
Yes, slightly. Helical piers have a threaded shaft that can trap moisture and debris more easily than the smooth, solid shaft of push piers. However, push piers are not immune to corrosion. The key difference is that Helical Piers vs Push Piers: Cost Comparison for Homeowners shows helical piers are often installed where push piers cannot reach due to access—many of those same sites have drainage issues that must be addressed. The vulnerability is more about location than the pier type itself.
Can water damage cause a helical pier to fail completely?
Yes, but only after many years of neglect. Severe corrosion can reduce the effective steel cross-section of the shaft from 1.5 inches down to less than 1 inch over a decade in wet, acidic soil. This can lead to sudden failure if the load is redistributed to other piers. A single pier failure often triggers a chain reaction. That said, with basic maintenance, the risk is very low. How Deep Should Helical Piers Be Installed? Expert Recommendations explains that piers installed at sufficient depth (typically 10–20 feet) have better soil support, which adds a safety margin even if corrosion progresses.
Is it worth spending money on waterproofing if I plan to sell the house in 5 years?
Absolutely. Foundation issues are a top red flag for home buyers. A well-maintained helical pier system with proper waterproofing and drainage adds to the home’s structural integrity and can be a selling point. You can recoup 80–100% of the cost of drainage work at sale if you show documentation. Conversely, a buyer’s inspection finding rusted brackets could kill the deal or drive down the price by £3,000–£5,000.
By following these best practices, you can protect your helical piers—and your foundation—from the silent, progressive threat of water damage. Regular inspections, proper drainage, and timely coating renewals are simple steps that pay dividends for decades.